Learn how to add notes and agendas when creating a meeting, or add them later to scheduled meetings in Qooper.
Adding Notes While Creating a Meeting
-
Sign in to your account through mentoring.qooper.io
-
Go to the Mentoring section.

-
Click the Meet button located below on the connection’s profile card.

-
Fill in the meeting details.
-
Add the required information such as date, time, and location.
-
Scroll down to the Notes & Agenda section at the bottom.
-
Type in any additional notes or agenda items.

-
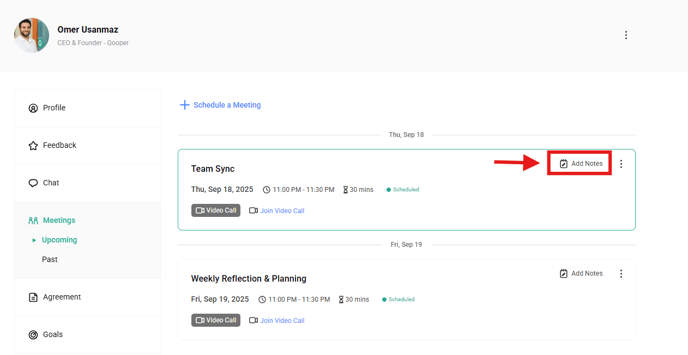
Adding Notes After Creating a Meeting
If you didn’t add notes during creation, you can always update your meeting later.
-
Go to your Upcoming or Past Meetings.
-
Find the meeting you want to update.
-
Click the Add Notes button in the top-right corner of the meeting card.
-
-
Enter your notes or agenda.
-
A notes page will pop up where you can type your content.
-
Click the blue checkmark to save your changes.

-
Troubleshooting
-
Can’t find the Notes & Agenda section?
Make sure you’re on the meeting creation or meeting detail page. Try refreshing your browser if it doesn’t appear. -
Notes not saving?
Double-check that you clicked the blue checkmark after typing your notes.