
Program admins can create and manage multiple surveys within a single program. Each survey can have its own name, description, questions, audience, and publication status.
With role-based targeting, admins can create surveys for Everyone, Mentee, or Mentor, making it easier to collect targeted feedback from different participant groups within the same program.
How to Create a Survey
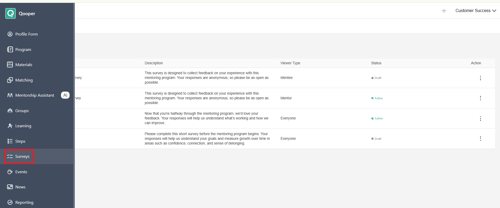
- Go to the Surveys section in your program.
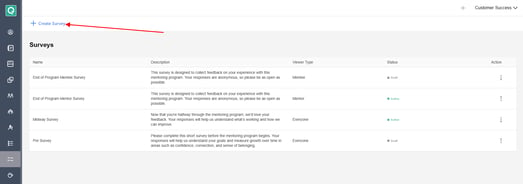
- Select Create Survey.
- Enter a Survey Name.
- Select an Audience: Everyone, Mentee, or Mentor.
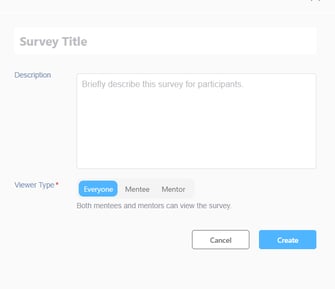
- The new survey is created in Draft status.
2. Configure Your Survey
From the survey click the three-dot menu (⋮) to access the following options: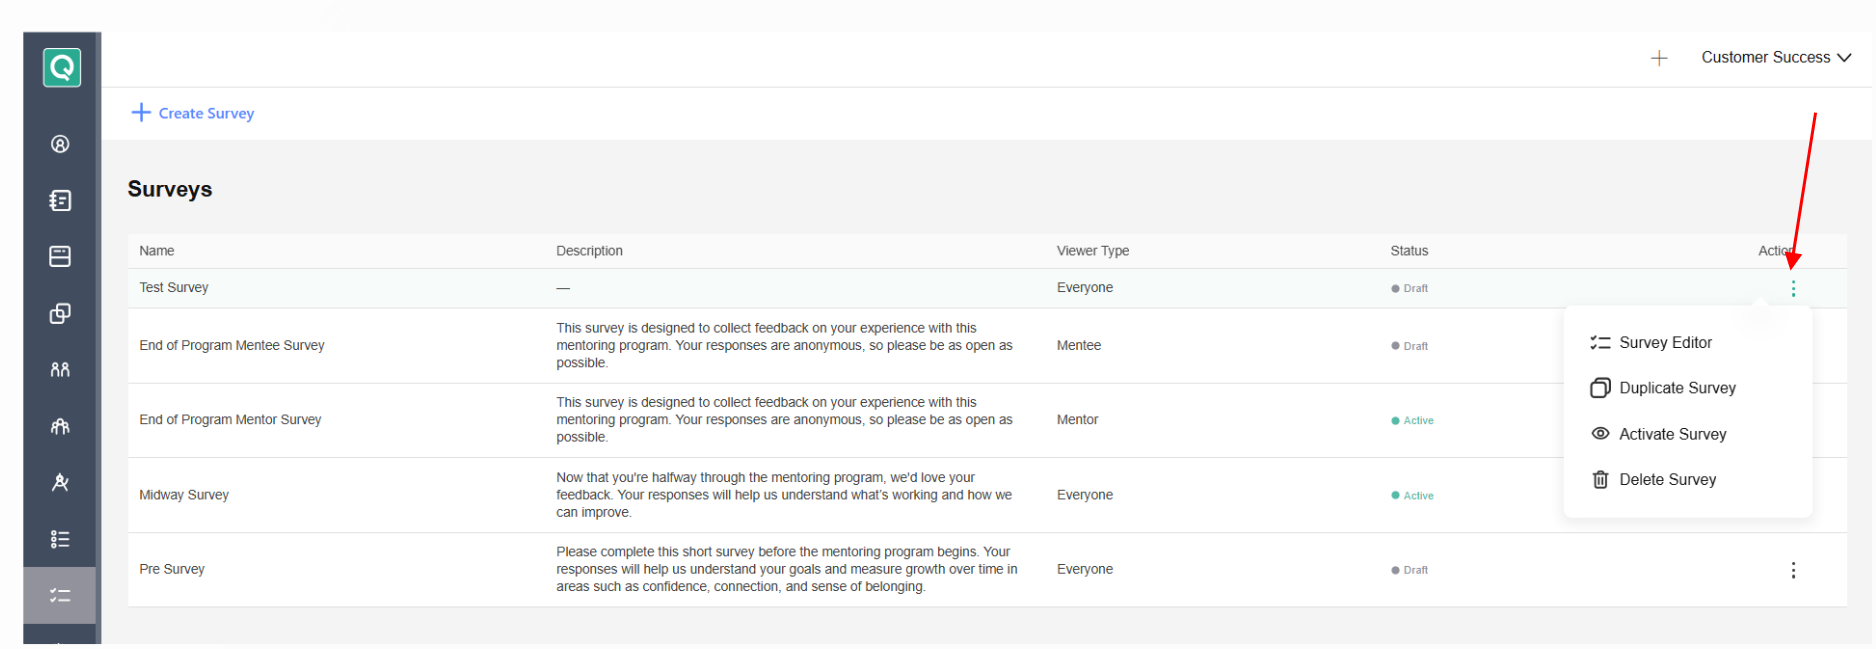
- Add and manage survey questions.
- Add an optional Description.
- Edit the survey name.
- Change the survey audience.
- Update the survey description.
Publish and Manage Surveys
Once your survey is ready, you can manage its status and other actions from the survey list or editor.
- Publish: Makes the survey visible to eligible participants.
- Unpublish: Keep the survey as a Draft and hides it from participants.
- Duplicate: Creates a copy of an existing survey. The duplicated survey starts as Draft.
- Delete: Permanently deletes the survey and its responses. This action cannot be undone.
💡 Tip: Publishing or unpublishing one survey does not affect the status of other surveys in the program.
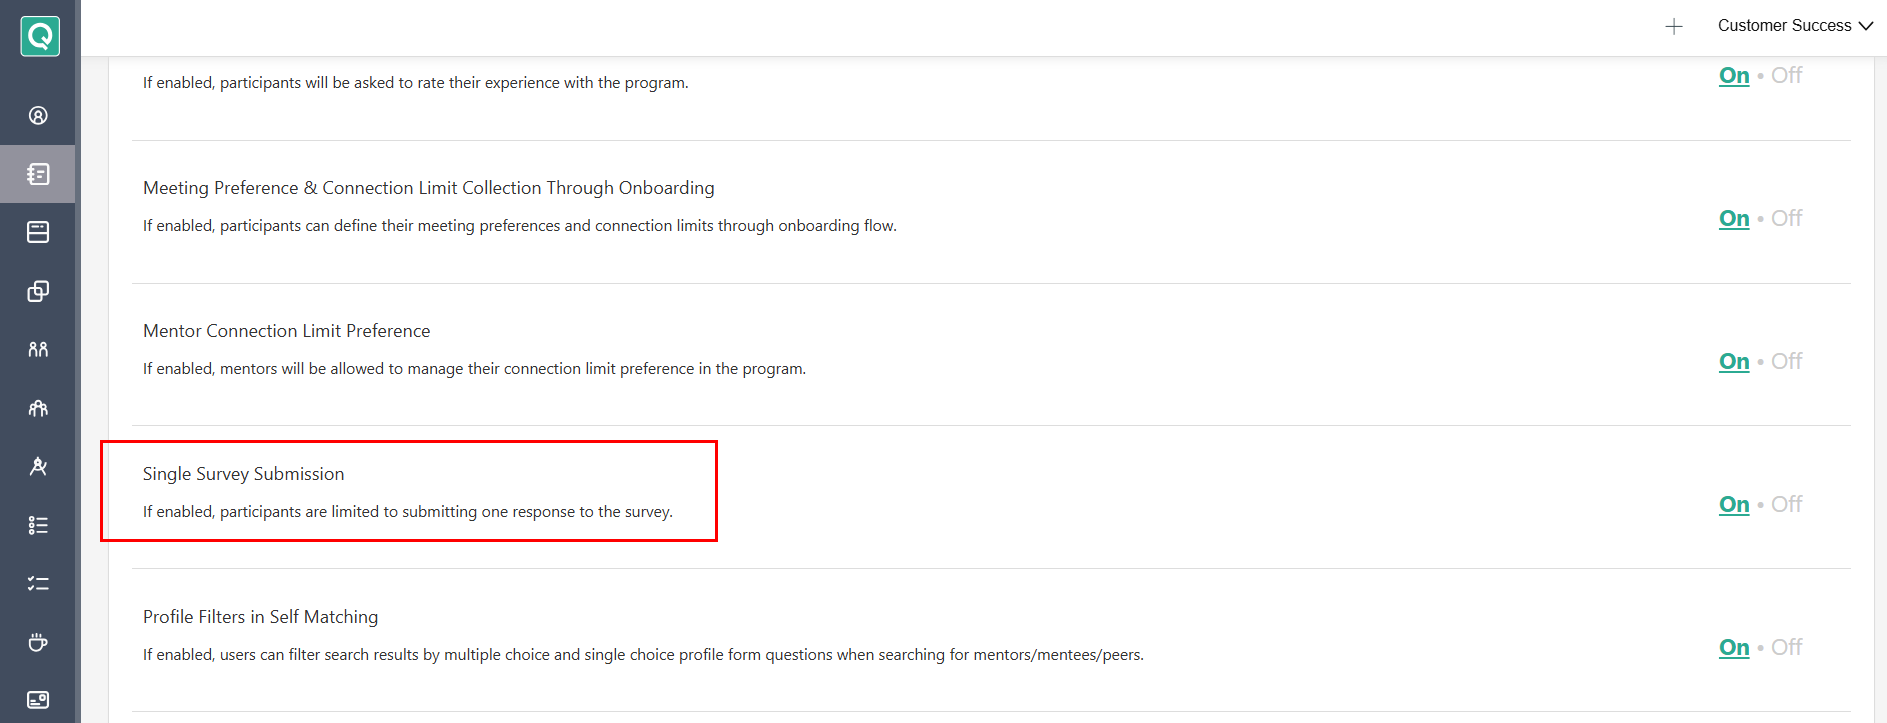
Single Survey Submission
The Single Survey Submission setting controls whether participants can submit each survey once or multiple times.
- Enabled: Participants can submit each individual survey only once. Submitting one survey does not prevent them from submitting another survey.
- Disabled: Participants can submit the same survey multiple times.
🎥 Video Walkthrough
💡 Important: Multiple surveys must be enabled for your organization by Qooper. If you would like to use this feature, reach out to your Qooper Customer Success Manager (CSM) or Qooper Support.