Importing Participants
Program administrators can bulk import or update their participants' profiles, e-mail addresses or statuses for each program.
This process can be beneficial when you’re starting a new program, want to change your participants' status in bulk, or update their profiles - in case their profile information, department, email changes or they leave your organization.
Preparing a file to be imported
To import the participants, you will first need to prepare your file for the import process.
Your file must contain unique e-mail addresses for each user at a minimum. Other than e-mail addresses, you can include your program’s profile form questions for the role you want to import, alphanumeric IDs that you have in your own system, or status value as “Active” or “Suspended” if you want to manage your user’s statuses in bulk.
The ID and status values will not be visible to your participants.
The identifier for your users will be e-mail by default. If you import the IDs, IDs will become the primary identifier, followed by the e-mail field.
When importing IDs, it’s important to use the same IDs on your SSO Provider(If SSO is set-up as an authentication method for Qooper.)
Please note that importing mixed up IDs may end up blocking your participant’s access to the program when they are trying to access via SSO.
Participants can be imported by their roles in Qooper. You will need to perform individual operations to import mentees and mentors.
You can use different delimiters to import options for multiple selection profile form fields in different files, but your preference should apply to all records in the same file.
To have your file prepared, the first thing you need to do is to identify the fields you want to import and fill the file with the data you want to transfer.
*Please take note that options for multiple choice questions need to be separated with commas "," as shown in the image below.
Once you’re done with your data, you can save it in csv, .tsv, .xls, .xlsx, .xlm, or .txt formats.
Here is an example of a .xlsx file:
-jpg-Dec-09-2022-08-52-35-4961-PM.jpeg)
How to Import Participants to Programs?
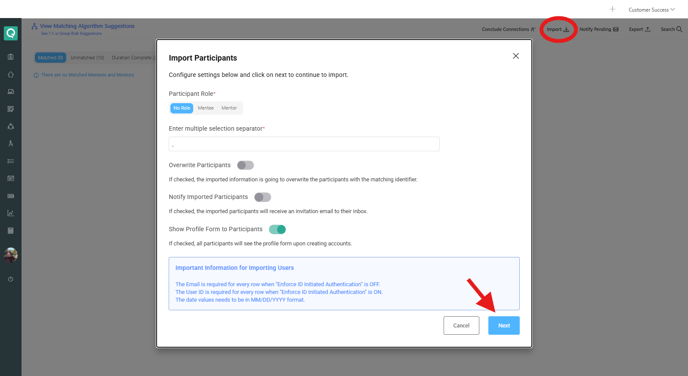
Step 1. Once your file is ready, go to Admin Dashboard > Matching Page and click to “Import” button.
Step 2. You will see a modal asking for the participants’ roles and your multiple selection separator. Click to “Next” after you select your preferences.
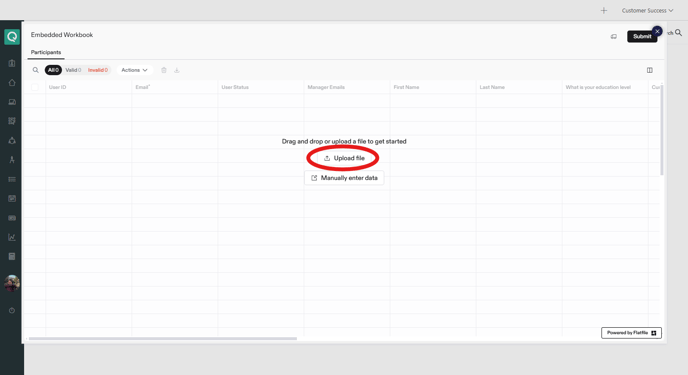
Step 3. Click "Upload file"
Step 4. If you have more than one sheet, select your sheet
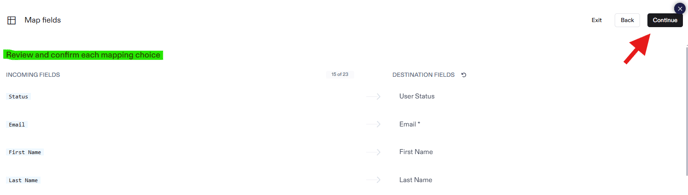
Step 5. Map the columns in your file with the profile form questions in your program, “User ID” if you want to import IDs, and “User Status” if you want to manage your user’s statuses. Once you map, click to “Continue”. You can also ignore any column that you don’t want to import at this point by choosing "Do not import".
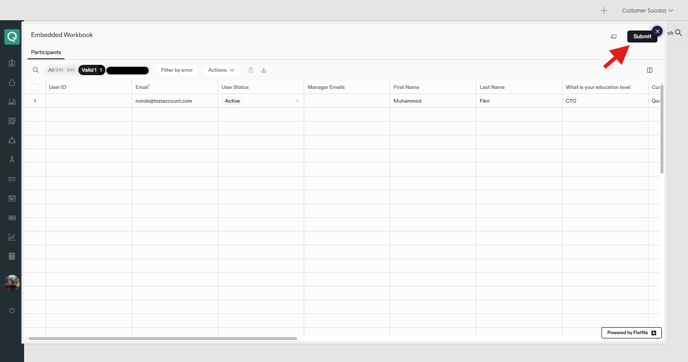
Step 6. Review your uploaded data. Then click “Continue” to finalize your process.
Depending on your file’s size, it might take a couple of minutes to finalize the upload. You will be notified when your import is complete via e-mail.
When you receive the e-mail, refresh the page. You should see your users uploaded to Qooper.
Copying Participants to Programs
To copy existing participants to a new program, an easier way would be to export participants from your previous program, modify the file to contain only mentors or mentees, then import it to the new program by following the steps above.
Updating User Emails
If any of your users’ e-mail address changes, they will have the option to change their email address easily from Web Platform > Profile > Account Tab. However, when Program Setting to Limit Users Editing Their Imported Profiles is activated or the users are authenticated via SSO, they will not be able to do so.
In this case, admins can update their email addresses by re-importing their data with ID. Simply importing the existing profile form data, ID and new e-mail address will update the e-mail information for the user.
Please note that trying to use an e-mail that belongs to another user in Qooper or users not having IDs defined will block the process.
Updating User Profile Information
To update participant profiles, you can re-import a file that contains information about the previously imported participants.
If you re-import a file without selecting “Overwrite Participants” option, only the users that hasn’t created their accounts yet will get updated.
If you re-import a file by selecting “Overwrite Participants” option, you can overwrite and update profile form information for all participants. When this setting is checked, leaving a field empty will remove the data and set the value to null.
Updating User Statuses
You can bulk update your users’ statuses by including a status field to your file to be imported. This helps when you want to restrict access for the users who leave your organization easily.
By simply suspending the users in bulk or one at a time, you can restrict their access to the platform, including the users who haven’t logged in yet.
If you want to change your user’s statuses, you will need to use “suspended” to suspend active and pending, or “active” to activate your suspended users.
The users who are under Pending tab can only be set to “suspended” since they are required to create accounts or fill out the missing profile form data to activate their accounts.
Leaving the field as empty with overwrite option will not change your user’s status. Leaving the field as empty without overwrite option will:
- Create new users as Pending if they doesn’t exist
- Keep the status as is if their account exists
You can also manually suspend or reactivate any user from Admin Dashboard by following the steps below:
Step 1: Click to any user that you want to suspend or reactivate. You will be redirected to their profile page.
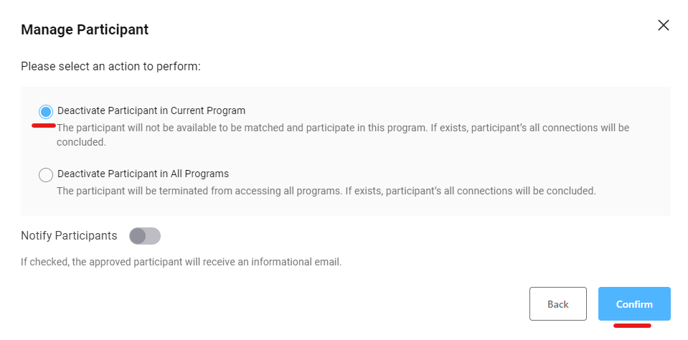
Step 2: Click on the "..." at the upper right corner, then select "Manage Participant." You can either choose "Deactivate Participant in Current Program" to prevent the user from accessing only the specific program, or select "Deactivate Participant in All Programs" to remove their access to all programs.

Program Setting to Limit Users Editing Their Imported Profiles
Program administrators have the option to lock the imported profile form data from editing by their participants.
The setting can be found under Admin Dashboard > Program page, Program Settings section.

By default, the setting will be “Off” for the new programs. When the setting is “On”, users will be restricted to edit imported profile form questions and will not be able to change their email addresses.
Users whose profile form data is fully imported will skip seeing the onboarding form and will be redirected to Home directly. Users whose profile form data is partially imported will see the onboarding form and will have the permission to edit the non-imported fields later on.
Once the setting is set to “Off”, all users will be allowed to edit their profiles.
Turning the setting to “On” after completing an import process will not require to re-import the data.
Please note that if your participants will be present in more than one program, it’s recommended to enable the setting on all programs so the changes they make in the program with setting off will not change the data in the program with the setting on.