This guide provides step-by-step instructions to set up and verify a custom email domain in Qooper. Completing this setup allows your program emails to be sent from your organization’s domain instead of default domains like qooper.io or qooper-mail.com.
1. Accessing the Qooper Admin Portal
-
Go to https://platform.qooper.io and log in with your admin credentials.
-
Click your account name in the top-right corner and select Account Settings.
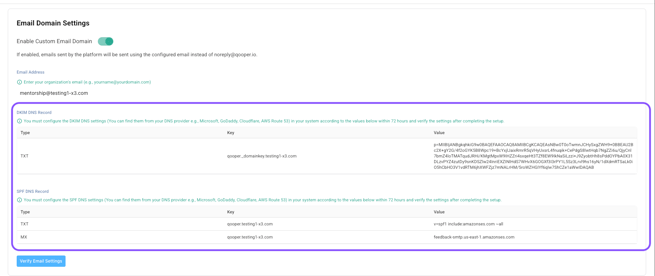
2. Enabling Custom Email Domain
-
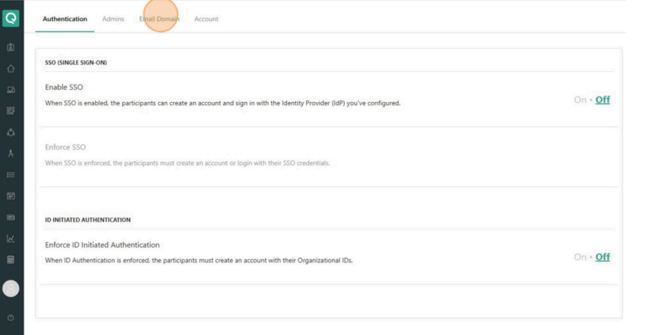
In the Account Settings menu, select Email Domain.
-
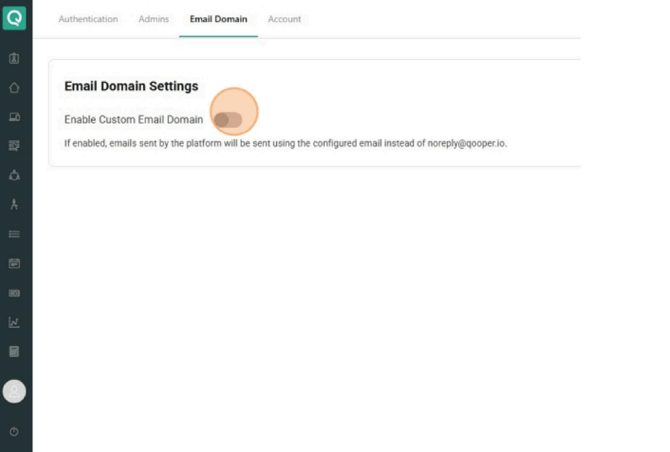
Toggle the switch to enable the Custom Email Domain feature.
3. Entering Your Custom Email Address
-
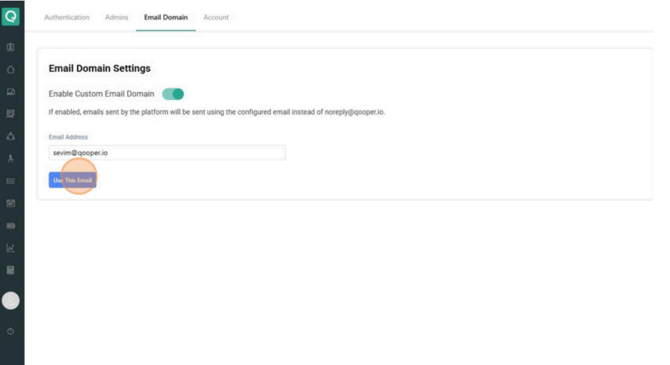
In the email field, enter your organization's email address (e.g.,
yourname@yourdomain.com). -
Click Use This Email.
-
The required DNS domain values will be generated automatically (DKIM + SPF records).
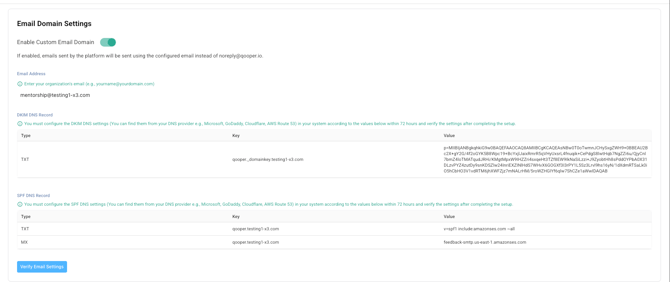
4. Configuring DNS Records
Once your email is set, you’ll need to add specific DNS records with your DNS provider (e.g., Microsoft, GoDaddy, Cloudflare, AWS Route 53).
Purpose of the DNS Records:
- DKIM TXT Record: The DKIM record ensures no one has tampered with message headers or content after it left your authorized servers. This protects recipients from phishing and spoofing attempts.
- SPF TXT Record: The SPF record (qooper.yourdomain.com. IN TXT "v=spf1 include:amazonses.com -all") authorizes Amazon SES servers to send mail on behalf of that subdomain. The mechanism include:amazonses.com is specific to Amazon SES infrastructure and does not open any broad trust to other Amazon domains (for example, amazon.com). Once this SPF record is published, messages will pass SPF authentication and align correctly under DMARC.
- MX Record: The MX record (qooper.yourdomain.com. IN MX 10 feedback-smtp.us-west-2.amazonses.com) does not affect your organization’s internal mail routing. It only applies to the subdomain "qooper.yourdomain.com" and allows Amazon SES to receive bounce and feedback notifications for messages sent through SES. No user or corporate mail is routed through this subdomain — it only handles automated delivery reports related to outbound SES messages.
Steps to Configure DNS Records
-
Log in to your DNS provider’s dashboard.
-
Go to the DNS Management section.
-
Add the provided TXT and MX records
-
Save your changes.
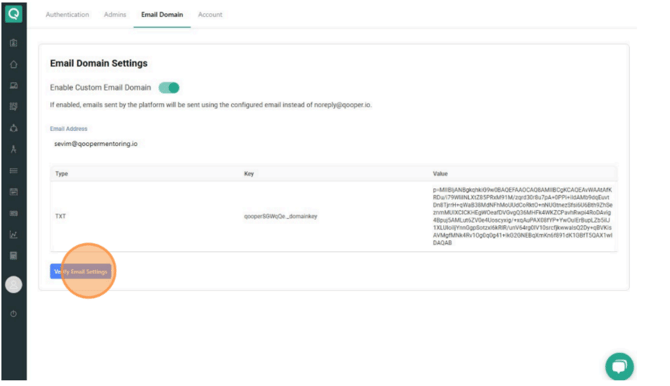
5. Verifying DNS Records
After you've added the DNS records, allow up to 24 hours for them to propagate.
-
Go back to https://platform.qooper.io.
-
Navigate to Account > Email Domain.
-
Click Verify Email Settings.
-
If successful, a verification success message will appear.
6. Testing and Finalizing Setup
Once verified:
-
Send a test email from Qooper to confirm successful delivery.
-
Check the email headers in the recipient's inbox to ensure the email was sent from your custom domain.
-
If emails aren't delivered, check the spam folder and review SPF/DKIM settings.
7. Troubleshooting
If you run into issues during setup:
-
Check DNS Records: Ensure all records are entered correctly, with no typos or extra spaces.
-
Wait for Propagation: DNS changes can take up to 24–72 hours to update globally.
-
Contact DNS Provider: Reach out to your provider if the records don’t appear as expected.
-
Contact Qooper Support: Email integrations@qooper.io for additional help.
Conclusion
By completing this guide, your custom email domain will be fully configured in Qooper, ensuring a professional and branded communication experience.
For further support, contact: integrations@qooper.io